Photoelectric Sensor | E3Z-R86 | Omron
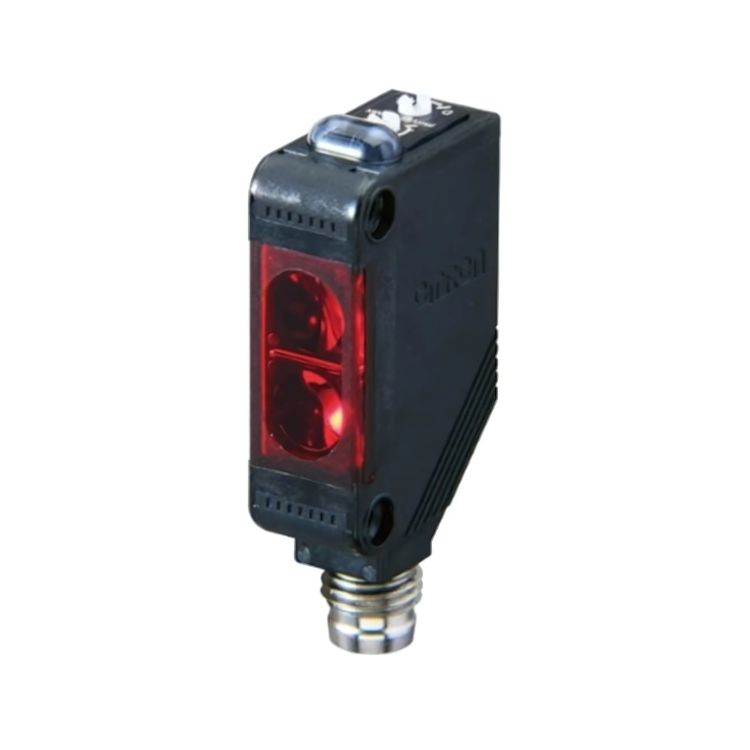
Do you need to automate how things in your setup are detected? Make use of this OMRON E3Z-R86 photoelectric sensor. It is a retroreflective apparatus that directs light toward a reflector. Because of its PBT casing, which resists impact and abrasion, this device may be used safely in severe environments. Omron E3Z-R86 Proximity Sensor Photoelectric Light ON/Dark ON PNP 400cm 12V to 24V 4-Pin. SENSOR, OPTICAL, 4M, PNP, 24VDC; Sensor Output: PNP; Sensing Range Max:4m; Supply.
Brand: Omron
Model: E3Z-R86
Type: Photoelectric Sensor
Introduction:
Make sure that the power supply to the Sensor is within the rated voltage range.
Do not short-circuit the load, otherwise the Sensor may be damaged.
Do not connect the power supply to the Sensor with no load connected, otherwise the internal elements may explode or burn.
It’s important to remember that when the load and sensor are connected to separate power supplies, you should always turn on the sensor before supplying power to the load. This ensures that everything operates smoothly and in the correct order.
- Always turn OFF the power supply to the Sensor before connecting or disconnecting the metal connector.
- Hold the connector cover to connect or disconnect it.
- Always tighten the connector cover by hand if using the XS3F. Do not use pliers.
- Vibration may disconnect the connector if it is not connected securely or may not maintain the proper degree of protection of the Sensor.
- When using other connectors, follow the recommended application conditions and tightening torque specs.
- Make sure that the optical axes are not in opposition to each other when mounting Sensors face-to-face. Otherwise, mutual interference may result.
- It’s important to install the sensor carefully to avoid direct exposure to intense light sources like sunlight, fluorescent light, or incandescent light. This will ensure optimal performance.
- Do not strike the Photoelectric Sensor with a hammer or any other tool during the installation of the Sensor, or the Sensor will lose its water-resistive properties.
- Use M3 screws to mount the Sensor.
- When mounting the case, make sure that the tightening torque applied to each screw does not exceed 0.54 N·m.
Make sure that the sensing side of the Sensor is parallel with the surface of the sensing objects. Normally, do not incline the Sensor towards the sensing object. If the object you’re sensing has a glossy surface, you can tilt the sensor by 5° to 10° as shown in the illustration. Just make sure that the sensor isn’t affected by any background objects. This adjustment will help with accurate detection.
| Specification | Detail |
|---|---|
| Shape | Cuboid |
| Sensing Method | Retro-reflective |
| Sensing Distance | 4000 mm |
| Sensing Distance (Min.) | 100 mm |
| Setting Method |
Manual adjustment |
| Connection Method |
Connector M8 – 4 pin |
| Output Type |
PNP |
| Operation Mode |
Dark-ON, Light-ON |
| Response Time |
1 ms |
| Material Housing |
PBT |
| Thread Size |
Other |
| Type of Light |
Polarized red light |
| Power Supply Voltage |
12-24 V |
| Features | M.S.R. |
| Degree of protection | (IP) IP67 |

